Everything You Need to Know to Login and Fully Experience Your Event!
Congratulations on registering for your iBreakthrough-hosted online event! We know you're looking forward to having a great experience and we're here to support you all the way! On this page you'll find all the instructions you need to login and enjoy a great event experience!
IMPORTANT:
System Requirements
Chrome Browser - All attendees MUST use Chrome as their browser to attend the online event. It can be downloaded from the Chrome store by clicking here.
Desktop or Laptop - All attendees MUST use a desktop or laptop computer to attend. You'll be unable to attend via table or mobile.
Camera and Microphone - All attendees MUST enable both the camera and microphone on their computers in order to attend. You'll be given a quick walkthrough on how to do that upon logging in to your event and we'll also preview that process below.
The Toolbar
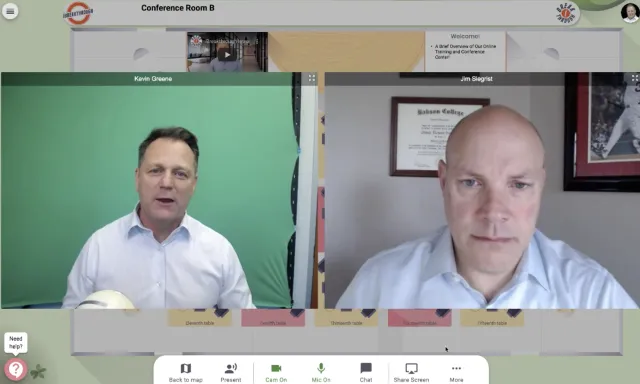
Your Easy-to-Use Event Toolbar.
Your event toolbar is located at the bottom of the floor map. This is where you'll adjust your view of the event, turn your camera and microphone on, engage in chat, share your screen, access whiteboards, and more!
Camera & Mic Setup
How to Turn On Your Camera and Microphone
Once you login, you'll be taken through a simple setup tutorial. During the setup, you'll be asked to turn on your camera and microphone. At the bottom of the. screen, on the toolbar, you'll see red camera and microphone icons with a line through them. Simply click on each of the icons and they'll automatically enable your camera and microphone for the meeting.
Camera & Mic Switch
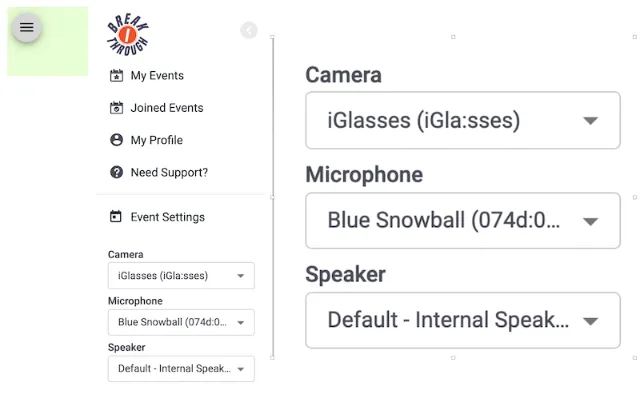
How to Change Your Camera or Microphone
If you'd prefer to use a different camera and microphone than what you're currently using, then go to the upper left corner of the screen and look for the hamburger menu (looks like an icon with three parallel lines). From there you can click on the drop down menus and select any of your available camera or microphone options.
Camera & Mic Trouble
Help! My Camera and/or Mic Aren't Working!
Below is a quick way to troubleshoot camera and microphone issues that should solve 98% of the problems you might experience. Try fix #1 below and test it. If it doesn't work, move on and try #2, etc. Try the following:
1. Make sure you're using Chrome as your browser! It's a must.
2. Try other camera/microphone options available to you in the Settings (as described above).
3. Check your privacy settings in Chrome to make sure your microphone and camera are enabled. To do so, click on the three dots in the upper right of your Chrome browser. Then, click on Settings from the drop down menu. Next, click on Privacy and Security on the left side menu. Then click on Site Settings and look for your Camera and/or Microphone settings. Each should be set to "Ask Before Accessing".
4. If none of these options are working for you then check to make sure the drivers for your camera and microphone are up to date. Download any updates that may be required.
Still having trouble? Use the chat widget below.
Table Movement
How to Move from Table to Table.
One of the things that make our events unique is your ability to move about the conference center as if you were actually there. To move from one table to another simply click on another table. If a seat is open (maximum 6 to a table), then you'll see your icon move to that table and you'll join the other participants at that table in a video conference.
Floor Movement
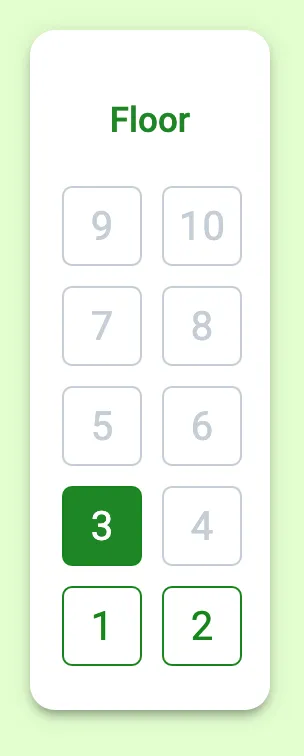
How to Move from Floor to Floor.
Our events essentially take place in a virtual building and within the building there are virtual floors. You can move from one floor to another simply by using the elevator buttons on the left side of the map.
Viewing Options
How to Change Your Viewing Options.
Once you're at a table, you can change your viewing options. By default, when you arrive at a table each of the video windows of the participants are small. To enlarge them, simply click on the "Table View" icon on your tool bar at the bottom of your screen. If you'd like to toggle back to the view of the floor itself with your videos minimized, then click on the "Floor View" icon.
Chat
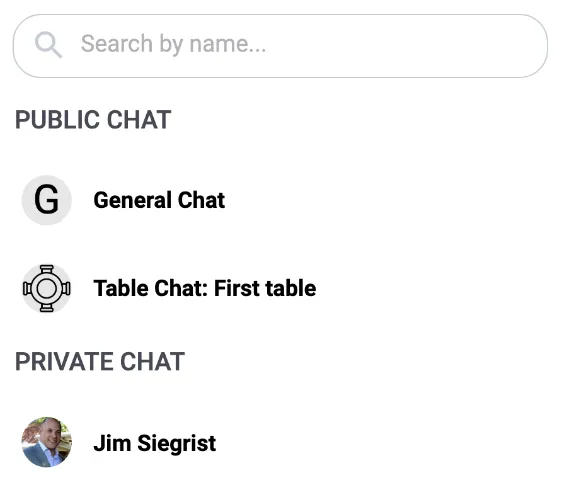
How to Chat with Others During the Event.
On the toolbar at the bottom of the floor map, you'll see a chat icon. Click on that icon to discover your chat options. Select General Chat to send a chat to the entire body of event participants. Select the Table Chat to send a chat just to those at your table. Select the name of an individual to send a Private Chat just to that person.